
Link to YouTube Tutorial: http://youtu.be/XCrTi2KEJ7g
As with all my blog posts about new Autodesk releases I will break down each new feature in separate posts and show the full scope of the new tools and features with a UK focus. Those of you that regularly read my posts will know that I keep a very close eye on the reinforcement tools and any new features or extensions that come to market. This year Autodesk have again focussed on the reinforcement and analytical tools for the specific structural enhancements for 2015. The primary goal with reinforcement is to give the RC detailer a better set of tools for the production of 2D RC drawings and accurate schedules.
In previous releases the RC drawings would show every bar but the user now how the choice of selecting the first and last bar in the set, a middle bar or user selected bars. This feature allows the correct presentation of bars in plan and elevation using a similar system to AutoCAD Structural Detailing.

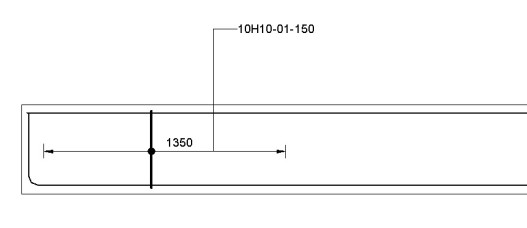
The Reinforcement descriptions have had a complete overhaul and can now detail bar with a range indicator and the correct terminators and leaders. This has been achieved by combining a dimension style with a rebar tag.

The other issue was with bar marks, Revit 2014 would allow multiple bars with the same dimensions to have the same bar mark! In Revit 2015 the bar mark is automatically generated and can be sequenced with a variety of differing options. Partitions are for setting bar marks for each element, you can also see the feature for removing gaps in bar marks and once this is enabled the process is automatic.

Another interesting concept is that parts can now host rebar, this has some potential but I do really think that families should be authored with parametric rebar, this would make more sense and give a huge amount of flexibility.
All the information and data can now be compiled into a full RC schedule that’s compliant with BS8666-2005.

When the ‘shipping’ version of Revit 2015 is released I will produce a full video showing the capabilities.
Link to YouTube Tutorial: http://youtu.be/XCrTi2KEJ7g
Hope this helps,
lawrenceH

Cool.
Long overdue enhancement will make revit more relevant to most concrete design engineers
Would you say Revit is capable of producing full RC drawings now?
Cheers.
Hi Anthony,
There are still some issues around tapered members and bars set out on a radius but in general you can now model, detail and schedule most concrete sections. It will be interesting to see what Autodesk do with Advance Concrete and if some of these tools will migrate into Revit Structure.
Hi Lawrence,
That sounds quite promising, although reverting to another package if we need tapered ranges would be a bit of a pain. Have you tested Advance Concrete and have you any opinion on that? I’m hoping to test that within the next week or so.
Hi Anthony,
I have briefly looked at Advance Concrete and it looks very comprehensive. I am waiting to see if this remains a stand alone product or if it’s absorbed into an existing BDS
Reblogged this on S-BIM & Sustainability for buildings and commented:
Nuevas herramientas de armado, sin duda necesitan mejoras, sin extensiones estás un poco perdido.
I used the beta version for revit 2015- i hoped it have more options but anyway the new rft tool is good and helped me to continue what my company began,
We are now totally able to produce rc shop drawings and many reinforcement conections and huge difficult roofs with varius slopes and levels
Revit 2015 is getting very close but there are still some annoyances over macro generated bar using non standard shapes eg (Stirrup – 31) and restrictions around putting the bars into a rebar set to document correctly. Hopefully Autodesk will update and improve these macros in the next release.
Hi Lawrence. I am just altering the system family for the rebar annotation as you’ve done. Not sure if this is a silly question but how did you get rid of the units from the tag? Also how did you manage to show the layer?
Thanks.
Actually I’m assuming layer is shown using the comments label?
Hi Anthony, i created a couple of shared parameters to control the layers, in this way you can also schedule them. The units are removed by selecting the value and then clicking the # icon.
Ah yes I’ve just found you can edit the parameter’s units in edit label. Thanks.
Hi Lawrence, a bit more advice if you wouldn’t mind. I’ve set up the schedule but I’m having trouble with the numbers of bars. Did you use the ‘Count’ field for number of members? I’ve tried to use that and then a calculated field to calculate the total number, but for some reason the ‘Count’ field isn’t available when using a calculated field.
Also I’ve turned off ‘Itemise every instance’ so that bar marks are combined, but is there another way?
Thanks.
Hi Anthony,
Sorry for the delay, just got back from holiday. I used Quantity and created a shared parameter for number of members and then used a calc. I also turned off itemise every instance and sorted by the schedule mark, this seems to work ok.
Hi Lawrence,
I’ve been playing around with shared parameters and everything seems to work quite well, although I’ve only detailed a few bar marks for testing. I’ve used Count for no. of members, Total No. for bars in each, and Quantity (with calculate totals turned on) for total no of bars.
I don’t suppose you’ve come across a way to alter the row height in the schedule, except for increasing text size?? I’m not keen on having 40-50 bar marks per page!
I’ve also been looking in to the Sofistik add-on with their developers as that adds extra functionality over Revit.
You cannot resize the data rows, only the title! A little strange I guess. I have been splitting the schedule which gives you a little more control on how the schedule is presented. We took a look at the Sofisik tool in 2014 and at the time this looked like a good way of over coming the range dimensions and showing single bars and also for producing varying ranges. I would imagine that Autodesk will address some of these limitations fairly soon as they are now in possession of the Graitec development team for Advance Concrete.
Yes, it is a bit strange. I also can’t find a way to print multiple schedule pages from the same Revit sheet, which means a separate sheet for each page, which is a little irritating.
I’ve provided quite a lot of feedback to Autodesk and Sofistik and had several discussions with both. I’m intending to use Revit and possibly Sofistik for RC detailing on a live project starting next week, so we’ll see how it goes!
Hi Lawrence:
I am new to Revit this year and I have to absorb a lot of new info very rapidly.
I watch your tutorials then attempt to replicate. Sometimes unsuccessfully. Your delivery can be rather fast for people like me. Here are some issues I have – your help would be appreciated:
1. In your tutorial on new features in Revit 2014 rebar you show how rebar can be assigned a color by diameter. You go into VG, expand the Rebar tree and see a list of bar diameters and associated colors. When I try this in Revit 2015 R2 I do not see this list of bar diameters. How can I assign colors to rebar by diameter?
2. In the above tutorial you have a View `3D Rebar`. How did you get this view?
3. In the 3D Rebar view you edit the Visibility States to show the rebar unobscured and as a solid. I have followed your steps exactly (except for your 3D Rebar View) but neither happens in my view.
4. In the beam I placed the first set of ties then mirrored them. But When I placed the set of ties to go between them I could not get any grips to display, so I was unable to expand the set.
Regards
Frank in Toronto
Hi Frank,
Glad you’ve found my blog useful and sorry that you have missed some of the steps in my videos, I am making an effort to create a detailed step by step guide for all my turorials. (See the recent filters).
1. The method is to create filters that colour revar by diameter. In The VG dialog box there is a tab for filters, if the diameter matches then use a specific colour.
2. This is simply a duplicated view with rebar shown in in obscured mode by using tbe revar view properties. I think this is the same question for 3
4. The links need to be placed with the maximum spacing option to show the shape handles.
Hi Lawrenceh
Can you tell me what tag you are using as I can not find one that matches the one you use in the video. I am assuming it is one that is included as standard and not a custom file.
Regards
Neil (UK)
Hi Neil, This is a tag that I produced myself to conform with typical UK details, fairly quick to produce.
Hi Lawrence, assuming i have two rebars with the same dimensions, but wanted to show them separated, i.e. In a symbolic representation, is this possible in Revit 2016?
For example, lets say i have two uk shape code 51 bars (closed links) both the same size, and i’m looking at a section through a beam. I want to display the bars as single lines, one inside the other, with a gap between the lines (like offset in autocad)
We frequently show bars like this, not really with links, but with hooks and bends of the same size, where one is deliberately drawn smaller than it actually is, for clarity on reinforcement drawings.
Just wondering if its possible to set this up in Revit 2016?
Hi Jan,
Unfortunately you cannot host a 2D detail into a rebar family otherwise I would have suggested this approach. An option would be to model the links as usual and then hide these and use a 2D Detail component.
LAWRENCE WOULD YOU MIND SHARING WITH ME YOUR CUSTOM TAG FOR DETAILING REBARS….WILL APRECIATE….AM A STUDENT..