
In this tutorial we will look at a simple method to generate piling from a finished ground level to a rock stratum from borehole data. Most of you will now have access to the Autodesk AEC collection but, I often find that people tend to use just one or two tools from this collection which doesn’t return value or efficiency. In this workflow we will utilise Revit 2019, Civil 3D 2019 and Dynamo.

This workflow can also be achieved using Dynamo and Revit to find the intersections between the piling and the surfaces, but this can take quite a while to execute on large datasets, is computationally expensive and will invariably crash the machine.

So, presented below is another option if you want to move into the use of Civil 3D. We will start in AutoCAD Civil 3D 2019. In Civil 3D you can either create the surfaces from points or from an existing set of contours a little like the workflow in Revit. We then place the pile locations as AutoCAD points and convert these points into Civil 3D points. The Civil 3D points can then obtain levels from surfaces. The group of points are then exported as a text file.

The next stage is to use Dynamo to organise and prepare these points for use in Revit. The Dynamo script will first open the text file and create an ordered list from the data.

Once this list is created, we then get the Project Base Point from Revit. The PBP is set to the local setting out point. This is then used to create the local coordinates that Revit will need to set out the piles.
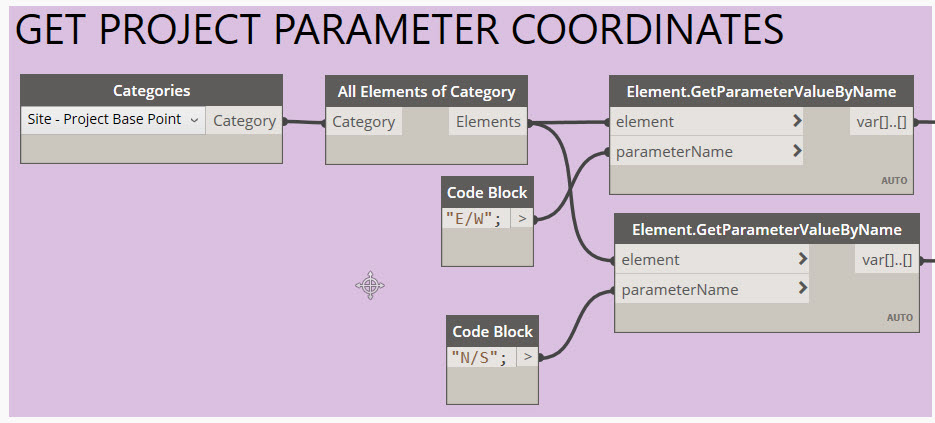
Because the top and bottom points are in the same list, we can use dynamo to sort the points on the X coordinates (the X and Y value will be the same for the top and bottom point). This section of the script separates the Eastings, Northings and Levels and transforms the coordinates to local grid suitable for Revit.

The last part then creates the Revit elements and sets the depth parameter to send the piles to the rock level.

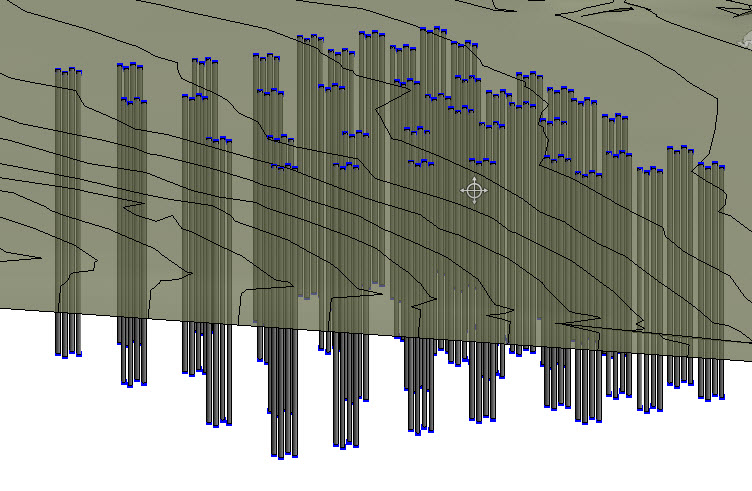
Here is the final layout in Revit.
Obviously, we can directly use the coordinates to create a piling schedule and use the point numbers to number each pile.
Hope that has been useful,
Lawrence H

3 thoughts on “Tutorial – Piling with Revit 2019, Dynamo and AutoCAD Civil 3D 2019”